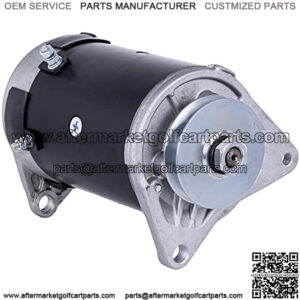
- Access the starter motor: Golf cart starter motors are typically located near the engine, often on the side or underneath. Consult your golf cart’s service manual to locate it accurately.
- Remove any obstructions: If there are any components or parts obstructing access to the starter motor, such as guards or covers, remove them carefully.
- Disconnect the wiring: Before removing the starter motor, take a picture or note the wiring connections to ensure you can reassemble them correctly later. Disconnect the wiring from the starter motor, including the main power cable and any other smaller connectors.
- Remove the starter motor: The starter motor is usually secured to the engine or transmission with bolts. Use a socket and wrench set to remove these bolts. Be cautious as the starter motor may be heavy, so get assistance if needed.
- Install the new starter motor: Position the replacement starter motor in place and secure it with the bolts you removed earlier. Hand-tighten the bolts first, then use a torque wrench to tighten them to the manufacturer’s recommended torque settings (found in the service manual).
- Reconnect the wiring: Attach the wiring to the new starter motor, ensuring the connections are secure and matched correctly to their respective terminals.
- Check your work: Double-check all connections and ensure that everything is properly secured.
- Reinstall any removed parts: If you had to remove any covers or guards earlier, now is the time to put them back in place.
- Reconnect the battery: Reconnect the battery and test the golf cart to see if the starter motor functions correctly.
how does a golf cart starter motor work
how to test a golf cart starter

